If the content is rich, unique, and 100% original, then your content will be promoted in search results, this way you can get more and more blog readers from search engines and can earn money from your blog .
Custom Robots Header Tags and their Meaning
| Directive | Meaning |
|---|---|
| all | There are no restrictions for indexing or serving. Note: this directive is the default value and has no effect if explicitly listed. |
| noindex | Do not show this page in search results and do not show a “Cached” link in search results. |
| nofollow | Do not follow the links on this page |
| none | Equivalent to noindex, nofollow
|
| noarchive | Do not show a “Cached” link in search results. |
| nosnippet | Do not show a snippet in the search results for this page |
| noodp | Do not use metadata from the Open Directory Project for titles or snippets shown for this page. |
| notranslate | Do not offer translation of this page in search results. |
| noimageindex | Do not offer translation of this page in search results. |
| unavailable_after: [RFC-850 date/time] |
Do not show this page in search results after the specified date/time. The date/time must be specified in the RFC 850 format . |
You may check more information about robots meta tags on Google Developers .
Note: Carefully go through the above table “Custom Robots Header Tags and their Meaning” before making changes. Otherwise don’t enable custom robots header tags.
Setup Custom Robots Header Tags on New Dashboard
1. Go to Blogger dashboard
2. Select one of your blogs
3. Click on the Settings
4. Navigate to Crawlers and indexing
5. Look for Enable custom robots header tags
6. On the right hand, there is a switch button. Click on that.
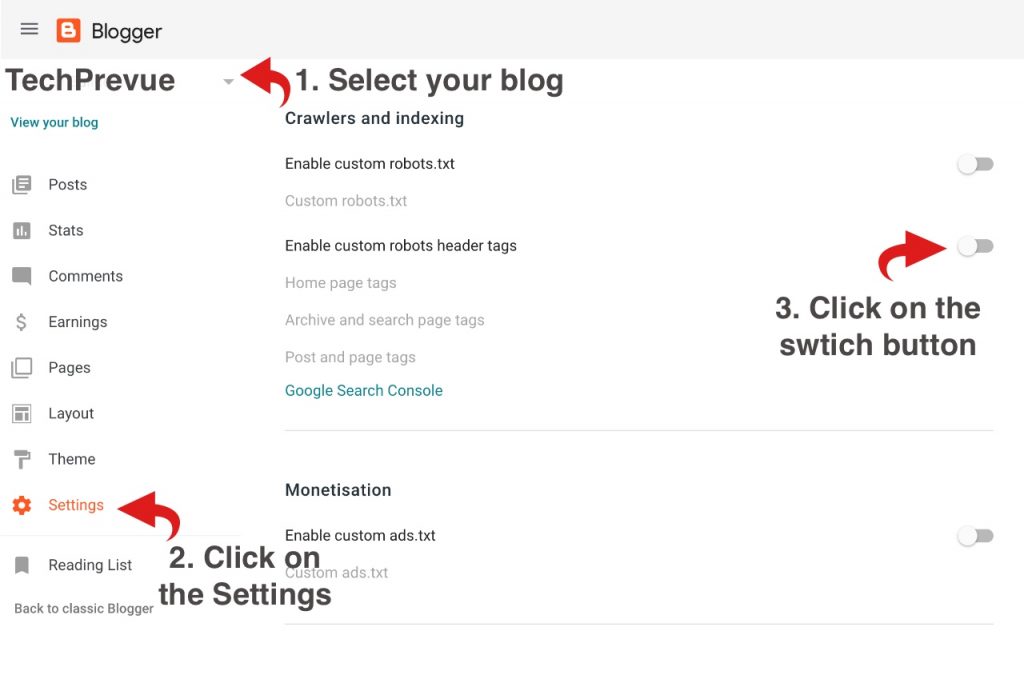
There you get the different types of custom robots tags. You may enable these as per your requirements.
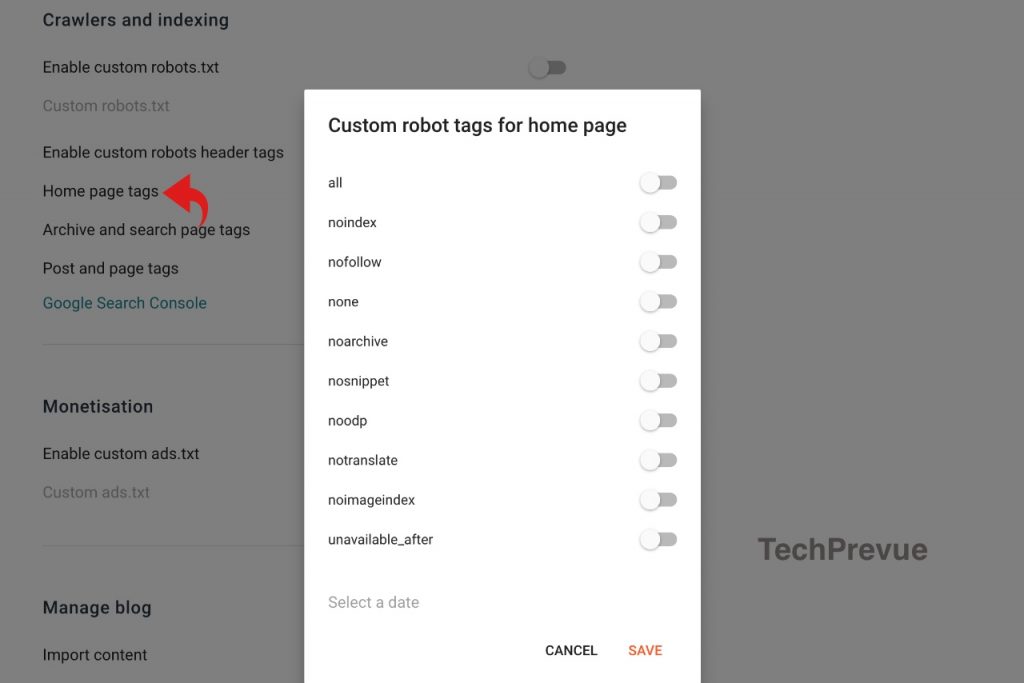
7. Now click on the Home page tags to set up custom robot tags for the home page, after making the required changes don’t forget to click the save button.
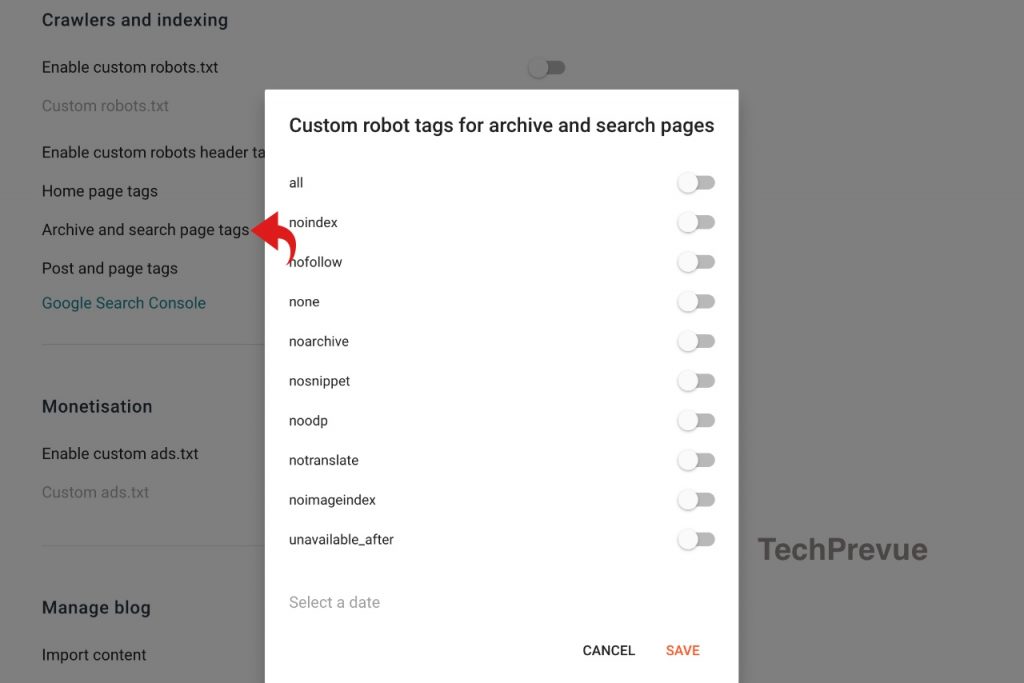
8. Similarly, you can set up custom robot tags for the Archive and search pages. If you are doing the required changes, then don’t miss to hit the save button.
9. The method is the same to set up custom robot tags for posts and pages.
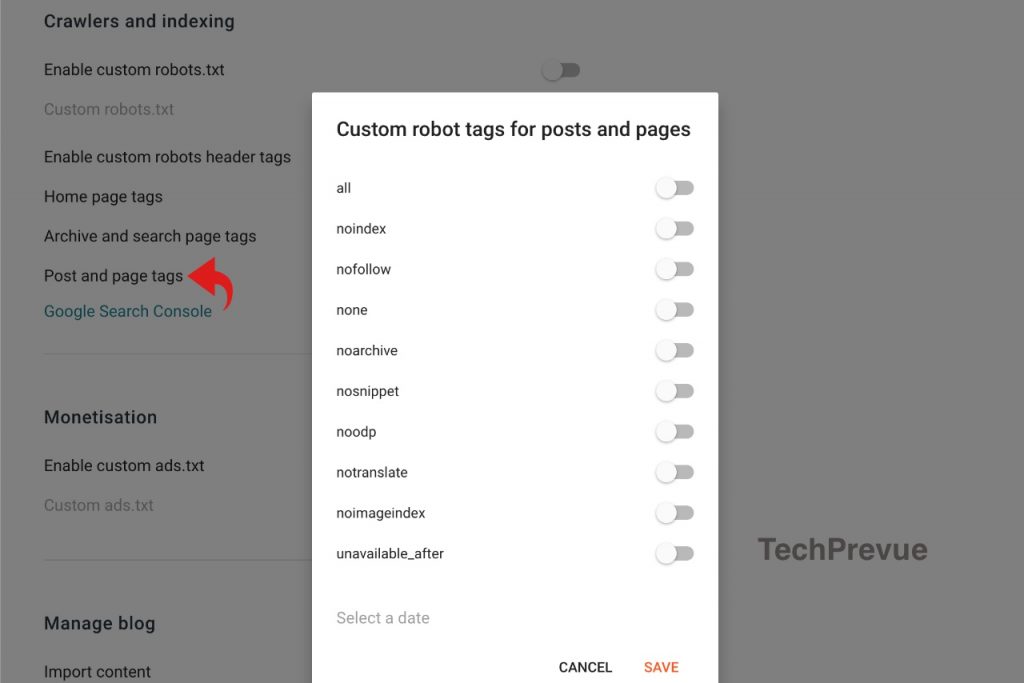
You may set up custom robot tags for posts and pages as per your preferences and requirements.
Warning: If you do not know what you are doing and what the result will be, then don’t play with custom robots header tags because it may remove your blog from search engines. Don’t press the Save button if not making any of the changes.
Setup Custom Robots Header Tags on Old Dashboard
1. Go to Blogger Dashboard.
2. Select one of your blogs.
3. Click on the Settings.
4. Click on the search preferences.
5. Look for the custom robots header tags.
6. Click on the Edit button.

7. After clicking on Yes, you can easily set the custom robots header tags parameters for Homepage, Archives and Search pages, and Default for Posts and Pages.
For more, you can take the help of the following screenshots.

Edit Custom Robots Tags on Posts and Pages
When you write or edit a post, there you can see the option to edit custom robots tags for that post or page.

Conclusion
This article will let you understand the benefits of custom robots header tags and make you able to customize these for your blog if you are using Google Blogger for blogging.
If you like this post then don't forget to share with other people. Share your feedback in the comments section below.


You are welcome to share your ideas with us in the comment!