

Table of Content (toc)
Preparing Your Blog
If you’re starting from a clean slate right now, you need to realize one thing:
You’re probably days away from writing your first blog post.
I’m saying this because you still have a lot of grueling hours of research and decision-making ahead.
Here are the tips that will help you through the process of preparing your blog:
1. Niche down
The ever-rising popularity of blogging is a double-edged sword.
True — it spurred in the creation of tools and services that make blogging more accessible than ever. On the flip side, the incredibly low barriers to entry have made blogging an extremely competitive industry.
That’s why niching down is one of the most valuable tips any aspiring blogger can learn.

2. Come up with the perfect blog name
Finalizing your niche is an important step towards coming up with the perfect blog name.
If you want to make a dent in your niche, your blog’s name should have the following characteristics:
- Easy to Remember — Let me be frank: using sophisticated words in your blog’s name is a terrible idea. Not only will it make your brand seem pretentious, it’ll also make it difficult for your audience to remember you.
- Related to Your Niche — If you have no clue as to what to call your blog, start with a relevant keyword. My blog isn’t called “Master Blogging” because it’s related to cooking, travel, or health, right?
- Use a Tool to Generate Keyword Combinations — Combinatorics is a free combination generator that can help you come up with unique blog names. You just need to enter a list of keywords and define your desired number of words in the name.
- Don’t Use Numbers and Hyphens — How many popular websites do you know with hyphens and numbers in the domain name? Probably not much, because those domain names can be downright confusing.
3. Register your blog name as your domain name
Naming your blog is akin to naming your domain name.
There’s a good reason why there aren’t a lot of blogs left with a different domain name.
Apart from making your brand more memorable, having the same name for your domain and blog is also favorable SEO-wise.
That’s why you should head straight to a domain registrar the moment you come up with your blog’s name. Go there and claim the domain name right away.
Popular domain registration service providers also offer web hosting solutions. To streamline the management of your domain, consider going with one company for your domain registration and hosting needs.

By the way, try to go for the “.com” version of your domain— as recommended by experts .
The main reason for this is because people are more familiar with it. Some even associate the TLD with a brand’s legitimacy.
4. Think about monetization
Don’t get me wrong — I know that some bloggers create their blogs purely for the joy of writing.
However, I also know that the majority of bloggers are in it for the money.
Before you commit to a niche idea for your blog, don’t forget to think about the monetization opportunities.
Do you want to earn passive income by promoting relevant affiliate products? Are you thinking of developing and selling your own software?
Whatever it is, it must align with the vision you have as you decide on your niche.
For new bloggers, I suggest reading this post for the complete list of blog monetization strategies you can do. I will also discuss some of my favorite blog monetization strategies later.
5. Start with free tools
It’s only natural for a new blogger to be quite the penny-pincher.
Good thing you can play safe with your money and make significant progress at the same time.
Most of the essential tools you need to get into the blogging industry can be used for free. That’s why WordPress — a free, open-source CMS — is vastly popular in the blogosphere.
Throughout this list, I’ll talk about a handful of other free tools you can use for various purposes. But since I already mentioned lead generation in the previous tip, allow me to start with MailChimp .
Put simply, it has everything you need in a lead generation campaign. You can create sign-up forms, landing pages, newsletters, and even automated emails for lead nurturing.

The best part is, you can take advantage of MailChimp’s core features for free. This is available for users with up to 2,000 total contacts — more than enough for new bloggers.
Of course, you eventually need to upgrade to a paid plan to better handle a bigger email list. Better yet, upgrade to a brand-new email marketing platform altogether with enterprise-grade features.
I personally use ActiveCampaign for all of my email marketing needs. It simply outclasses MailChimp’s free tool when it comes to features geared towards generating conversions and building relationships with subscribers.

6. Choose the right blogging platform or CMS
When you decided to be a blogger, you should understand that every decision you take moving forward is crucial. This includes choosing the blogging platform or Content Management System you want to work with.
That’s a decision you should never, ever rush.
Once your blog goes live on one platform, it’ll be extremely tricky and inconvenient to switch.
To help you make the right choice from the get-go, allow me to present the top platforms in the market:
- WordPress.org
- WordPress.com
- Wix
- Squarespace
For a detailed comparison of these platforms, check out my post on the best blogging platforms .
Just for the record, I use WordPress myself due to its versatility, scalability, and the price tag of free.
It’s not exactly the most user-friendly CMS around, but the learning curve isn’t too steep, either. Plus, the internet is teeming with free learning resources that can help WordPress newbies learn the ropes.
7. Have a to-do list
As I begin my work duties each day, there’s one app that I always launch first.
No — I’m not talking about my word processing app or internet browser.
Before I write a single word, I always make sure to use Trello to plan my day ahead. It’s a list-making tool that lets you turn your daily tasks into trackable cards, which can be organized into lists.

I use Trello every day to break down large tasks into smaller chunks, prioritize them, and set deadlines. I can also add attachments, create mini checklists, and add labels for easier task management.
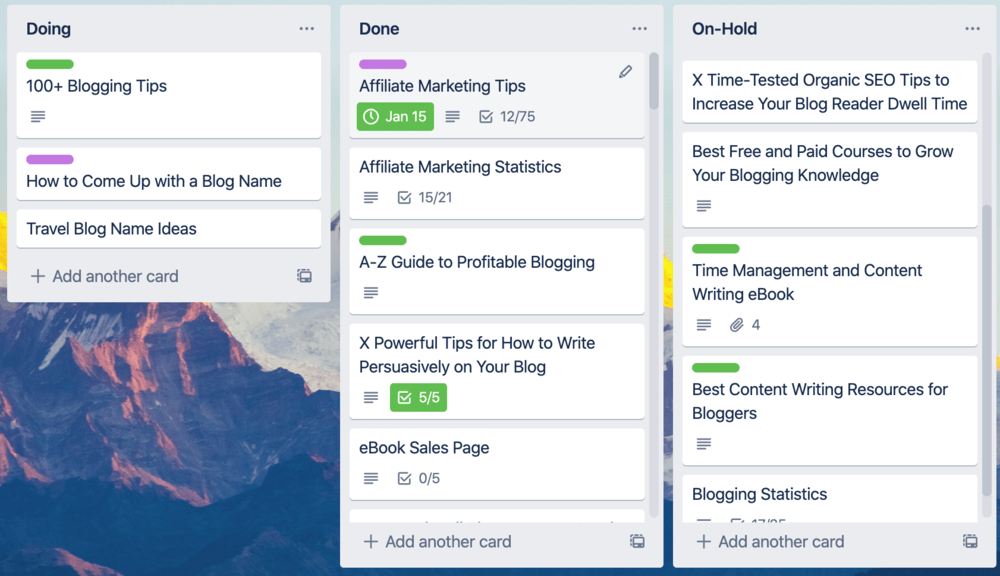
Despite all these features, Trello is completely free to use. Regardless, you’re free to use other alternatives like the built-in “Reminders” app for Mac and “Sticky Notes” for Windows.
Building Your Blog
So, you now have a niche, domain, and ideas for your blog’s monetization.
The next order of business is to actually build your website — pages and all.
8. Make your blog fast and snappy with a lightweight theme
After choosing a blogging platform, your next task is to look for a theme to represent your brand.
This is actually the part where blogging can get really fun.
If you went with a site builder like Squarespace or Wix, you’ll have hundreds of professional-looking themes to choose from. But if you’re like most bloggers and went with WordPress, you’re looking at thousands of themes across multiple marketplaces.

Exciting, isn’t it?
In just a few clicks, you now have a visually aesthetic and functional blog up and running.
There are only a few guidelines you ought to remember when choosing a theme for your blog:
- Go Lean — The less visual elements there are on a page, the faster the blog will load. Since user experience should be your top priority, pick a theme that only has the barebones of what you need.
- Avoid Outdated Themes — A theme that’s recently updated is far less likely to have issues with the current version of your blogging platform. It’s also a good indication that the developers are still active — ready to patch errors or provide assistance whenever necessary.
- Look at Ratings and Reviews — If you plan to use a free theme, it’s ideal to test and evaluate it yourself. But if you are looking to buy a premium theme, always check the ratings and reviews of other users.
9. Create a child theme
If you’re working on a WordPress site, you don’t just recklessly edit your theme after installation.
Sure, WordPress themes can be modified immediately after being installed and activated. Doing so means you’re modifying the “parent theme,” which also means you’ll be messing with the theme’s core files.
This can make mistakes very risky since they can render your whole blog out of order.
Not to mention that updating the parent theme may effectively revert the customizations you’ve made.
Creating a child theme for your customizations will allow you to avoid these issues altogether. It inherits all the functions of the parent theme while allowing you to safely customize its appearance and features.
You can learn the steps of creating a child theme from this WordPress Codex article . Alternatively, you can use a plugin like Child Theme Generator to skip the technical aspects of the process.

10. Run a vulnerability check on your WordPress Blog
As much as I love WordPress, it’s not exactly the most secure CMS in the world.
Security company Sucuri revealed that 90 percent of all cleanup requests in 2018 is for WordPress websites.
As frightening as it sounds, it’s not totally surprising. After all, WordPress is known to support countless third-party plugins and themes — the primary attack vectors of security vulnerabilities.
With this in mind, running a vulnerability scan on your WordPress site whenever you install new stuff makes perfect sense.
WPScan is one of the fastest WordPress vulnerability scanners available right now. It can be used via the web interface or as a plugin that can be launched from your dashboard.
With a free WPScan account, you can check the integrity of up to one WordPress website. You can even schedule monthly scans to ensure the security of your blog as it continues to evolve.

11. Install WordPress updates smartly
From a security standpoint, it’s always a good idea to install the latest updates — including updates for themes and plugins.
Software updates, after all, usually contain patches that fix vulnerabilities detected in previous versions.
Experienced WordPress users, however, will wait for feedback from other users before updating anything.
Sometimes, updates will bring about introduce problematic issues — especially if the developers packed the update with new features.
As a safety net, install WP Rollback to revert plugins to their previous versions whenever necessary. It also works on themes, which is a huge plus for users who constantly tinker with their site’s appearance.

When you’re ready to install updates, hover over ‘Dashboard’ and click ‘Updates’ from your WordPress admin area. A small number should indicate how many updates are available for your WordPress installation.

You will then be taken to a page where you can update all your plugins and themes in bulk. If you want to update the WordPress CMS itself, just click the blue ‘Update’ button at the top of the page.

12. Install security plugins
Apart from timely updates, do you know what else can keep your WordPress blog safe?
That’s right — WordPress security plugins.
Wordfence is a popular WordPress security plugin with a comprehensive toolset.
Its main features are Web Application Firewall that blocks malicious traffic and malware scanner to maintain your WordPress installation’s integrity.

Wordfence also has login security features to protect your blog against brute force attacks. You can enable two-factor authentication, CAPTCHA, or both.

Got your Wordfence security plugin all set?
There’s just one more thing you need to remember before you go about your day.
Whatever you do, don’t set the traffic logging feature to “All Traffic.”

Enabling traffic logging for every user on your site is known to significantly reduce performance. This effect is more noticeable for sites on a shared hosting plan.
13. Set up a backup plugin
As a serious blogger, you should see your blog as an investment.
And, just like any other investment, it must be protected.
The reality is, running vulnerability checks, frequent updates, and installing security plugins aren’t always enough.
Remember, even websites with substantial cybersecurity measures can still get hacked. That’s why yearly cybersecurity incident reports never have a shortage of successful attack records.
To give your blog a last line of defense, make it a habit to create backups of your blog files.
This can be done with automatic backup software like Dropmysite or with the built-in backup tool of your hosting service.
14. If you can, monetize from day one
First of all, I firmly believe that building quality content should be your top priority when starting a blog.
As long as you can provide enriching experiences to your audience with your blog content, monetization opportunities will surely come.
Still, I’m not discouraging you to grab opportunities to make money when they present themselves as soon as you start. If you want to ask for donations, sell homemade products, or promote an offline business, do so.
It may be unlikely, but quality traffic can stumble upon your site as soon as it launches. This is especially true if you utilize social media to gain instant traffic from day one.
15. Have a lead generation strategy ready ASAP
Reluctant to employ monetization strategies right off the bat?
You should at least have a lead generation strategy in place.
All you need is a single piece of amazing content to get the traffic going and earn your audience’s trust. After this, think of a user-oriented value proposition and pair it with a well-designed opt-in form.
First off, a value proposition is essentially an explanation of why your audience should consider taking action. This means it should highlight the benefits of your offer and tackle the pain points of your readers.
You can learn a lot by observing the value propositions used by big-name marketers for lead generation.
Here’s an example by Brian Dean of Backlinko :

Wait a minute, I could barely customize my site’s theme — how am I going to build a functional opt-in form?
Don’t panic.
In the digital marketing world, there are drag-and-drop tools for most anything.
16. Integrate a contact form into your blog
Every blog should have a functional contact form from day one, regardless if you’re ready for lead generation.
The steps involved here will depend on your blogging platform of choice. For popular platforms like Wix and WordPress, the solution requires the integration of an extension.
WordPress, for example, supports a slew of contact form plugins that are free to use. The most popular one would be Contact Form 7 with over five million active installations.

To use Contact Form 7, create a new form by clicking ‘Contact’ and ‘Add New’ from your dashboard. The plugin lets you construct your contact form by editing the pre-made template, which already includes the codes you need.

After building your contact form, you can add it to any page or post using an auto-generated shortcode. You can find this on the ‘Contact Forms’ section of the plugin’s menu.
Creating Content for Your Blog
A blog isn’t a blog without a library of informative articles.
Right after you build your site, the majority of your time will be spent producing high-quality content.
No — perfect spelling and grammar won’t be enough for this.
Here’s a list of the things you need to do to create awesome content for your blog:
17. Learn to do keyword research right
One of the biggest mistakes that a lot of new bloggers make is to take keyword research for granted.
Remember, your keyword strategy alone can make or break your content marketing. It can rake in hundreds of visitors to your post or waste your resources with content no one will read.
Despite this, some bloggers tend to skip keyword research when writing articles. If not, they do some form of h
In a nutshell, effective keyword research today means finding keywords that are:
- Classified as Long-Tail Keywords — The difference between a broad keyword and long-tail keyword is that the latter contains three or more terms. Long-tail keywords are generally less competitive, more targeted, and usually more profitable than broad keywords.
- Use the Right Keyword Research Tool — Free keyword research tools are great for generating content ideas for your blog. But if you’re doing SEO, pick a tool that can accurately gauge metrics like difficulty, volume, and estimated traffic cost.
- Pay Attention to User Intent — Despite having promising metrics, a long-tail keyword may not be a perfect fit for your goals. You also need to determine the user intent behind a keyword, which could be informational, transactional, or navigational.
Another thing to note is to list down several keyword ideas that are relevant to your content topic. By targeting related keywords on a single page, you can generate traffic from all users who search for those keywords.
For Master Blogging, I shoot for around 10 keywords per article, but I never force keywords where they don’t belong.
As a pro tip, I use Trello to form keyword checklists to keep track of those keywords while writing.


18. Know where to place keywords
Curating a list of keywords for your content idea is just a small piece of the puzzle.
When you’re actually writing your draft, you must also know where to insert your keywords.
The general rule for all keywords is to mention them at least once in the article. As for the placements, here are the things you should remember:
- Insert your focus keyword in the introduction — A post’s introduction helps both search engines and human users determine what it’s about. When writing one, it only makes sense to mention your focus keyword — preferably near the beginning.
- Add keywords to subheadings — Subheadings improve your content’s scannability and are prime spots for your target keywords. I’ll tell you more about subheadings in a while.
- If possible, add your focus keyword to your post’s title — Inserting keywords in the post’s title has been the norm for a long time, but it mustn’t be forced. A simple trick to slide your keyword into your post’s title is to use dashes.
There are other important places to put your keywords if you want to optimize your site for SEO. They are each post’s meta description and internal link anchor texts.
We will cover both steps in the “Optimizing Your Blog for Search Engines” section later.
19. Use subheadings smartly
Here’s something you should already know about me:
I’m a huge fan of long-form content that’s filled to the brim with information.
The only problem is, I know many visitors don’t really read entire posts from start to finish. This is true if they don’t find the exact information they need quickly enough.
To boost reader retention, I make it a point to use as many subheadings as possible when creating long posts. Most readers, after all, skim through a post to look for anything that catches their attention.

How many subheadings should you aim for?
Yoast recommends adding a subheading for every 300 words in your article.
I suggest sticking to this rule whenever you can to maximize your content’s scannability. Just don’t stress over exceeding this limit on occasion — your readers can probably forgive you for that.
20. Learn to make click-worthy headlines
Here’s a hard pill to swallow:
You can do everything right SEO-wise and still not get clicks from search engine results pages.
If you have this issue, you may not be using headlines that can pique the interest of search engine users.
Whether you like it or not, a headline can single-handedly turn potential readers away or invite them into your post. As such, it must be descriptive, thought-provoking, and perfectly optimized.
The CoSchedule Headline Analyzer is a great tool that will help you check all these boxes. It focuses on factors like length, word balance, and reader sentiment.

21. Use the Emotional Marketing Value Analyzer
A person’s emotion is a driving factor in their decision to click on a post or not.
If you want your audience to read your content, the headline must plant an emotional urge for them to click. This is significantly more important when your content is being spread on social media.
This is where the Emotional Marketing Value Headline Analyzer by the Advanced Marketing Institute comes useful. It works by analyzing the word composition of your headline and assessing the type of emotion it ignites.
To use it, just type in the headline you want to use for your content and click ‘Submit for Analysis.’

The tool shall immediately present you with the percentage of EMV or Emotional Marketing Value words in your headline. It also dissects the emotion it instills in readers and determines if you’re likely to get a positive response.

22. Aim to publish link-worthy content
In the world of blogging, quality backlinks are a commodity that you can’t survive without.
Unfortunately, they’re also a commodity best earned naturally — not bought or bartered for.
Sure, I advocate for healthy link building practices that involve writing quality content and providing value to users. But if you want to build a healthy backlink profile for your blog, start by focusing on your content.
Make them informative, valuable, and polished beyond perfection.
They must contain information that can’t be found elsewhere. For content pieces that borrow inspiration and ideas from competitors, come up with unique ways to present the revamped information.
23. Include Statistics
Speaking of creating link-worthy content, have you tried creating data-driven posts yet?
It doesn’t matter if you did your own study or compiled facts from other sources. If your blog post contains statistics, you have a good chance of being linked to by content writers.
Remember, citing statistics from valid sources maximizes the impact of your content’s message. It informs readers that you know your stuff — worthy of their time and trust.
This is something that I do whenever the opportunity presents itself.

To look for statistics you can use in your content, use Google and add the word “statistics” with quotation marks.
Also, set Google’s search filter to grab results no older than a year. This makes sure you won’t be supplied with outdated information when writing content.

24. Start utilizing custom visuals
If you’re still not utilizing visual content in your blog, you’re doing it very wrong.
No — I’m not talking about free stock photos that average content writers use as featured images. I’m talking about brilliant, custom graphics you can whip up with tools like Visme and Canva .
Also, no — you don’t need to be a professional graphic designer to use them. Both tools feature a drag-and-drop interface that will let you make professional-looking graphics within minutes.

Incorporating visuals into your content strategy will help you gain more social media shares and backlinks. Most importantly, detailed visuals will significantly improve the experience of your readers.
25. Prioritize honesty
Let me tell you something a lot of bloggers overlook.
As soon as they start generating traffic, they become too focused on monetization that they become reckless with their credibility.
This becomes a problem if they begin to engage in practices that can damage their reputation in the long run. A classic example is a blogger who blatantly writes biased, positive reviews of affiliate products for the sake of sales.
If you do it on a small scale, you can probably get away with it. But as readers begin to notice your tactics, their trust and your whole brand’s reputation will collapse.
With these things in mind, I earnestly want you to remember the following tips:
- When writing product reviews, use the product yourself. That’s the only way to provide authentic and believable opinions that will lead to sales.
- Don’t make up a fake backstory for your brand. You, as a blogger, will be more relatable to your audience if you share real scenarios and experiences.
- Don’t be afraid to write negative reviews. If a potential affiliate product didn’t click, find a similar product from another partner and offer it as an alternative.
Whenever I write reviews, I make sure to be truthful and include a few cons. I do it even if I’m completely happy with the product after using it myself.
26. Use a free grammar checker
Even if you have perfect spelling and grammar, mistakes still happen.
It probably won’t be a total disaster for you if you miss a mistake or two. But why take the chance when you can simplify the proofreading process with a grammar checker?
My personal favorite would be Grammarly , which offers a free version for bloggers on a tight budget.
To use Grammarly, you can edit your document using the web interface or install the downloadable desktop app.

Grammarly is also available as an add-on for Microsoft Office products, including Microsoft Word . The only downside is, the integration only works if you’re running on Windows.
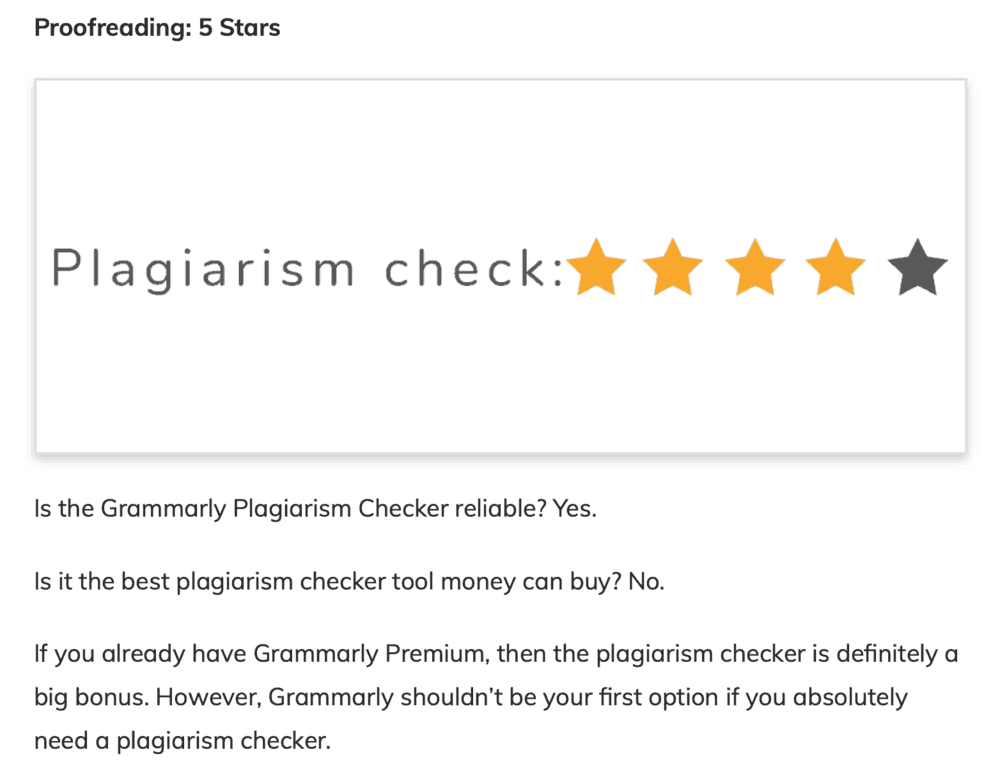
Lastly, you can use Grammarly’s plagiarism checker to ensure the originality of your content.
It’s often not needed if you’re sure you wrote every sentence yourself. Search engines like Google, however, don’t care if your plagiarism is intentional or not — your rankings will still suffer.
27. Read your content aloud during the proofreading process
Even if a sentence is grammatically correct, it may still sound a little off when read by native English speakers.
Relying on automated grammar checkers won’t help you avoid this — unless it has a “read aloud” feature.
Reading your draft aloud is one of the most important lessons I learned in my 10 years of blogging. It helps me ensure that the words smoothly flow out of the reader’s mouth and mind.
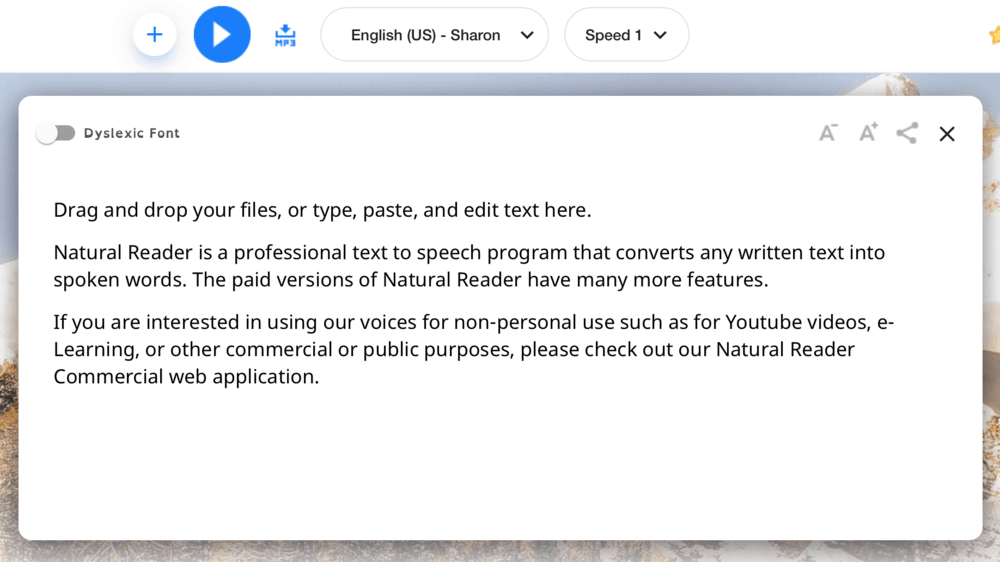
If reading English words isn’t your strongest suit, you can count on text-to-speech tools like NaturalReader . This will also enable you to spot grammar and spelling errors without gluing your eyes to your computer’s screen.
28. Avoid wordy sentences
Another way to make your content easier to read is to construct short and to-the-point sentences.
A personal rule of mine is to limit each sentence to only 20 words or less. This makes it easier for readers to digest each and every point I’m making.
If your sentence exceeds the 20-word limit, chances are it can be split into two, shorter sentences.

29. Don’t overthink your introduction
I agree that the introduction is one of the most important parts of an article.
Its job is to capture attention, set their expectations straight, and compel your audience to read from start to finish.
Sadly, some bloggers tend to overthink their introduction and put their productivity to a grinding halt. I remember being a victim of this as well — wasting several minutes typing, revising, and deleting the introduction.
When in doubt, just skip writing the introduction and jump straight into the main body. Trust me, you’ll have an easier time writing it if you have a concrete idea of what your content’s about.
If you still don’t know what to write, maybe these tips can help get the ball rolling:
- Tell a simple story — Try to recall your thought process when you first came up with the content’s topic. You could be experiencing a problem, reading another blog, walking in the park, and so on.
- Ask a question — Starting off with a question is a great way to have readers put on their thinking caps. It can be aligned with the problems they’re having or the goal they want to achieve.
- Just get to the point — After asking a question or telling a story, my preferred strategy is to dive right in with the right phrases. Some examples are “without further ado,” “let’s get started,” and “let’s jump into it.”
30. Add a clickable table of contents
If your goal is to improve your content’s scannability, there’s a lot more you can do than just add subheadings.
I, for one, commit to creating a clickable table of contents for each and every post.
Long-time Master Blogging readers should already know this by now.
With a clickable table of contents, readers can conveniently skip ahead to whatever section captures their interest. They no longer need to scan paragraphs upon paragraphs of text to find what they’re looking for.
To create a table of contents for your blog post, you can use a WordPress plugin called Table of Contents Plus . It automatically scoops up elements on your content with the “heading” attribute and generates a list with clickable links.

31. Avoid using long and complicated words
What’s that, you have an impressive vocabulary and impeccable command of the English language?
That’s great — but your blog isn’t the place to show off those skills.
Save those talents when you’re writing a book. In blogging, it’s always better to use short and simple words that create a pleasurable reading experience.
Whenever I feel like I’m using a word that may confuse some readers, I replace it with a simpler synonym.
Luckily, most word processors like Google Docs let you find synonyms without leaving the application.

32. Add some word variety
A built-in thesaurus will be one of your best friends as a full-time blogger.
Apart from finding simpler word alternatives, you can also use it to add variety to your content writing vocabulary.
Sure, it’s probably fine to use the word “good” a few times in your post. But when you use it to describe literally everything that’s positive, a thesaurus will be a big help.
As a Microsoft Word user, I seldom have problems with word variety when writing — thanks to its integrated synonyms finder. The same can be said if you’re using full-fledged word processors like Google Docs.
33. Look at content ideas that worked for your competitors
We all know that doing content research for your blog is time-consuming.
Even if you spend hours generating topic ideas, there’s no guarantee that your content will get the attention it deserves.
Borrowing your competitor’s top content ideas is a reliable way to eliminate the risks involved in content research.
It basically lets you benefit from the content research your competitor already did. Furthermore, it will give you more time to create something more updated and polished.
To do content research, use a tool that can identify your competitor’s top content in terms of links and traffic.

Once you find your competitor’s best posts, the next step is to create pieces that are better in every way.
To achieve this goal, the following four tips should help greatly.
34. Regularly find and replace outdated information
If your competitor’s top content is over a year old, chances are it contains outdated information that you can update.
This alone gives you a chance to make an article that’s objectively more valuable.
However, you shouldn’t only do this when borrowing content ideas from competitors. If you want your content to have evergreen value, do it regularly with your own posts.
Scan your content library for information that may be outdated and no longer accurate. As for me, I’m constantly on the lookout for articles that need to be revamped.
35. Offer actionable and well-explained steps
As per my experience, a competitor’s post can always be upgraded by adding more step-by-step information.
In most niches, the majority of blog posts contain general guidelines and tips that lack actionable steps.
This is more prominent with run-of-the-mill listicles that plenty of bloggers publish often.
By providing more fleshed-out, easy-to-follow instructions, your content will be substantially more valuable than your competitor’s. It doesn’t even matter if the original idea was theirs.
If you’re wondering how I apply this tactic, I use a screenshot tool called Snagit to visually present instructions. It’s an easy-to-use tool that lets you add annotations, shapes, callouts, and arrows to your screenshots with a few clicks.

36. When writing listicles, cover 10 items to maximize shareability
Listicles are among the favorite content formats of bloggers.
They are easy to make, simple to write, and are shared more on social media.
It’s also easy to come up with listicle ideas — perfect if you feel like running out of unique content topics to cover.
I’m pretty sure you will write dozens of listicles in the future, so I’ll give you a little tip. According to a study , listicles with 10 items in them are shared the most on social media.
Monster listicles with 50 or even 100 plus posts are, of course, more valuable to high-quality leads. But if your short-term goal is to beef up your blog’s traffic, keep calm and write about only 10 things.
37. Repurpose text information into visual form
We already covered the importance of utilizing visual content in today’s competitive blogging industry.
But what if you have no clue on what custom visual to make?
If you’re borrowing content ideas from a competitor, you can one-up them by converting their information into visual form.
Creating simple visuals for statistical data is perhaps the most useful application of this tactic. You can also translate bits of information into share-worthy quotes, which you can turn into an Instagram post with Canva.

38. Repurpose content into YouTube videos
If you’re a new blogger, it may be hard to imagine yourself speaking in front of a camera on YouTube.
Still, you can’t deny that having a thriving YouTube channel is an excellent goal to aim for.
In the blogging world, an established YouTube channel pretty much proves that you’re an authoritative and trustworthy brand. As such, the biggest names in plenty of niches have YouTube channels with thousands of subscribers.
It may not be achievable today, tomorrow, or even months from now. But when the time comes and you’re ready to build your YouTube channel, refer to this post [YouTube Article Here].
39. Don’t ignore podcasts
The rise of podcasts in the blogging world isn’t an accident.
They help users consume content while doing daily, menial tasks like commuting, driving, working out, and so on. There are also people who prefer listening to podcasts while lying on their couch or bed with their eyes closed.
If you think that podcasts are just a fad that will go away soon, think again.
The truth is, high-income bloggers are actually five times more likely to publish podcasts. So, it’s another thing worth adding to your list of blogging goals.
40. Use AnswerThePublic to unearth more content ideas for your blog
If you find it difficult to formulate content ideas with keyword research, you will love AnswerThePublic .
True enough, it doesn’t have as many features as most keyword research tools. What it does well is providing you with tons of potential, question-based ideas that will draw your target audience’s attention.
Not to mention that AnswerThePublic is free to use.
To start your content research with AnswerThePublic, enter a relevant keyword and click ‘Get Questions . ’

AnswerThePublic will then generate a long list of questions that you can use as topics for your next blog posts.
By default, questions are presented visually. For a clearer and more organized view of these questions, switch to the ‘Data’ view.

41. Write with a conversational writing tone
Adopting a conversational writing voice is one of the best decisions I’ve ever made for my blogging career.
Sure, you’re more than welcome to write using a formal, textbook-style tone. It may, however, make the writing experience dull and monotonous — things that will drain your motivation in the long haul.
If you want to stay in this business, you need to have fun when writing. Embracing your own, personal writing voice is a surefire way to do this.
42. Always compare notes and verify your facts
Let me share a bite-sized trivia about myself.
Whenever I’m writing articles, I always have at least one browser tab open for fact-checking purposes.
True — you can write faster if you’re writing about a topic you already know. However, I often try to verify every statistic and fact I state in my content.
All it takes is just one false information and your readers may lose their trust in your brand.
To avoid such a fiasco, I constantly compare notes with other credible websites whenever I make a claim. A simple search on Google with the “ Past Year ” filter enabled often does the trick.

Remember that what you know right now may no longer be true tomorrow. Change is constant in the online marketing world and it’s vital that you keep up with the times.
Blog Monetization Strategies
Once you commit to creating quality blog content, it’s only a matter of time before traffic starts pouring in.
Take note that you can start either blog monetization or traffic generation at this point. You could even do both at the same time.
But since you’ve probably spent cash to get where you are now, let’s discuss ways to make it all back.
43. Make money with affiliate marketing
Let’s get one thing straight:
Affiliate marketing is, hands down, a must-have monetization strategy for bloggers.
In affiliate marketing, you’re not selling your own products. Rather, you’re promoting the products of another company so they can make a sale on their own site.
You, as the affiliate marketer, get paid in commissions for every customer who uses your unique affiliate link .
To make that happen, you need to write insightful content that compels them to take action and buy the product.
44. Develop your own product or service
I understand why many bloggers feel more comfortable with affiliate marketing as opposed to creating their own products.
Investing resources into your own product or service, after all, can be risky. But if you want to be one of the high-income bloggers, it’s absolutely worth considering.
Statistics reveal that 45 percent of high-income bloggers making over $50,000 per year sell their own products. It can be your very own eBook, online course, handmade products, or professional services.
If you’re worried about the risk, remember to have a user-centric vision when developing the selling points of your product.
As an example, I’ve been recently exploring new product ideas that can get my core audience ticking.
I already know that the Master Blogging Pro helped a lot of my audience grow in the blogging industry. To help further their success, I listed down the other challenges and pain points that my online course didn’t address.
At the very top of that list is “how to become a better and more productive writer.” This ultimately led to the creation of The Content Rulebook .
To develop a product that sells, I suggest you follow suit and identify the top challenges of your core audience.
45. Make money with ads
It’s true that you won’t become a blogging millionaire by showing ads on your blog.
In one particular study, Chris Lee of RankXL estimated that he needed 150,000 visitors monthly to make $100 a day. Yes — he made all of that money purely with Google AdSense .
It is safe to assume that you are nowhere near getting that much traffic as you read this post. In which case, displaying ads alone won’t be enough to sustain your blog.
Still, income is income — no matter how small.
Also, remember that ad revenue is passive income. Set it up once and you’ll barely need to touch it again in order to generate profits.
The only thing you should be careful of is how displaying ads can hurt the user experience on your site.
Don’t trade your audience’s perception of your brand for a few advertising dollars.
If you’re still struggling to generate traffic on your blog, focus first on optimizing your visitors’ experience. Advertising programs like AdSense can wait — they won’t go anywhere.
46. Get paid for writing sponsored posts
The blog monetization strategies I’ve already discussed above may be reliable, but they’re all tied to your blog’s traffic.
Writing sponsored posts, however, lets you make quick bucks.
As the name implies, sponsored posts are pieces of content that another brand has paid you to write. It can be a product review, how-to guide, or anything that can put their product in the best light.
In some instances, brands are even willing to produce the content for you. All you need to do is publish it on your blog and you’re golden.
To look for sponsoring brands, start with websites like PayPerPost . Just register a “Creator” profile to be visible to companies looking to expand their online reach.

47. Request for donations
Don’t underestimate the generosity of the online community, especially if you’re able to satisfy their thirst for information.
By requesting for donations, you can dedicate more of your time creating and polishing your blog content. In return, your loyal readers will express their gratitude in the form of cash.
PayPal can help you get a donation system on your blog working in no time. You simply need to sign in, configure your button’s style, and set the donation options you want to offer.
The website should automatically generate the code you need to add your PayPal donation button to any page. It’s also available as a shareable URL and QR code.

Just be mindful that the PayPal donation button is intended to be used by non-profit organizations. While it can be used by anyone to receive donations, you’ll soon have to transition to proper, creator-centric donation platforms.
Better yet, turn your blog into a membership business to get recurring revenue from your audience.
48. Consider gating your content
Content gating is another monetization strategy you can do with little setup.
In simple terms, gated content is something locked away behind a sign-up form. Whether or not they should pay money in the process is entirely up to you.
There are email marketing platforms that let you gate your blog posts with the help of integrations. Another option would be to pay for services like MemberStack to start leveraging your content for monetization or lead generation.

The cheapest option, of course, is to use a free WordPress plugin for your content gating needs. Ultimate Member , for example, is a membership plugin with a “content restriction” feature that locks certain content from unregistered users.

If you want to turn your blog into a full-on membership business, you should take a look at Patreon .
Put simply, Patreon is a platform designed to help content creators run and grow a membership business. It’s used by creators around the world for the opportunity to monetize doing what they love — from bloggers to YouTubers.

49. Get paid as a guest post contributor
Regardless of your niche, guest blogging should become a part of your long-term blogging strategy.
For most bloggers, guest blogging is the main engine of their link building campaigns — the bread-and-butter of modern SEO.
We’ll explore the SEO side of things later. For now, let’s take a look at how guest posting can be monetized.
There’s actually very little left to explain. On the internet, there are dozens of websites that pay good money for guest posts.
You could even make over $200 per guest post if you know where to look.
If you’re interested in being a paid guest contributor, here are some sites you should consider:
- Longreads — $250 per 800-1,000 words or $500 for long research essays
- eCommerce Insiders — $75 for 400-600 words or $125-$150 for articles over 600 words
- MoneyPantry — $150 per a minimum of 700 words
- Income Diary — Up to $200 per post for quality articles
50. Get paid for sponsored social media posts
In the information age, forward-thinking companies will pay for every inch of online reach they could get.
That includes the reach that bloggers can provide through their official social media channels.
Depending on your niche, you can make money with sponsorships using your Instagram, Facebook, Twitter, or YouTube account. For most niches, sending out sponsored tweets should be the most feasible.
SponsoredTweets can act as the middleman between bloggers and the companies who want their message spread via Twitter.
Just like PayPerPost, you need to create an account to be found by these companies. The only difference is, you’re signing up as an influencer specifically rather than as a creator.

Social Media Marketing Strategies
The thing about social media monetization is, you need to have an established social media presence for them to work.
It’s a good thing that bloggers need to build their social media presence, anyway.
Let me walk you through the fundamentals real quick.
51. Create an official Facebook page
I’ve already mentioned social media a handful of times in this post. However, I haven’t really delved into the specifics yet.
With that said, let’s start with how you can promote your blog on Facebook — the largest social network to date.
Building an official Facebook page for your brand is, of course, the first step.
There are already tons of guides out there that discuss this in detail. To save you time, here are three of the most important takeaways you should remember:
- Use a recognizable profile picture — As the first thing Facebook users see, your page’s profile picture should be recognizable as well as eye-catching. Using a high-resolution version of your logo is a common practice, but you can also design something new specifically for Facebook.
- Set a custom and informative cover photo — Just like the profile picture, your page’s cover photo should be designed with the same vision and level of care. It must also have some branding elements like your blog’s value proposition, URL, and Twitter handle.
- Create a CTA Button — Facebook allows pages to have call-to-action or CTA buttons that can be configured to do all sorts of things. For bloggers, the usual route is to create a CTA button than brings users straight to their website.
If you want a more comprehensive guide on how to create a memorable Facebook page for your blog , click here .
52. Spread your blog content through social media
A blogger’s Facebook page has two roles.
First, it serves as a platform that lets them engage and build relationships with their audience.
Secondly, it is a powerful content distribution channel that can — at zero cost — amplify the reach of your content.
Interested in the former? Don’t worry, I’ll share crumbs of advice on leveraging social media interactions with your audience in a bit.
For now, let’s have a word about distributing content on social media.
No — sharing your posts on your Facebook page isn’t enough to establish your presence on the site. You must also:
- Get the timing of your posts right — If you want your Facebook posts to reach the most people possible, share posts on Wednesdays from 11AM to 1PM. A study by Sprout Social revealed that this timeframe generates the most engagement for Facebook posts.
- Use social media automation tools — Automating your social media posts eliminates the risk of human error and is a huge time-saver in the long run. There are paid social media planners out there you can use, but there are also free plugins like Blog2Social .
- Create shareable custom graphics and use them as featured images — To increase the shareability of your posts, use a tool like Canva to create custom featured images. This will only take a few minutes — thanks to the pre-made templates provided by these tools.
53. Communicate with your social media followers frequently
Interacting with your audience is an important aspect of social media marketing.
You can’t just treat your social media pages as content distribution points. To make your audience feel more invested and involved in your brand, you should also lend them an ear.
A great first step is to start paying attention to the comments that your audience leaves on your posts.
This is surely something you can implement from day one. Just check your social media accounts often and answer the questions that your followers ask and acknowledge their feedback.

54. Acknowledge comments posted on your blog, but moderate them
Social media comments are great and all, but you shouldn’t ignore the insights and opinions posted on your blog.
Modern CMS and blogging platforms have made it easier than ever to manage your blog’s comments. However, it’s in your best interest to manage how comments get approved on your blog.
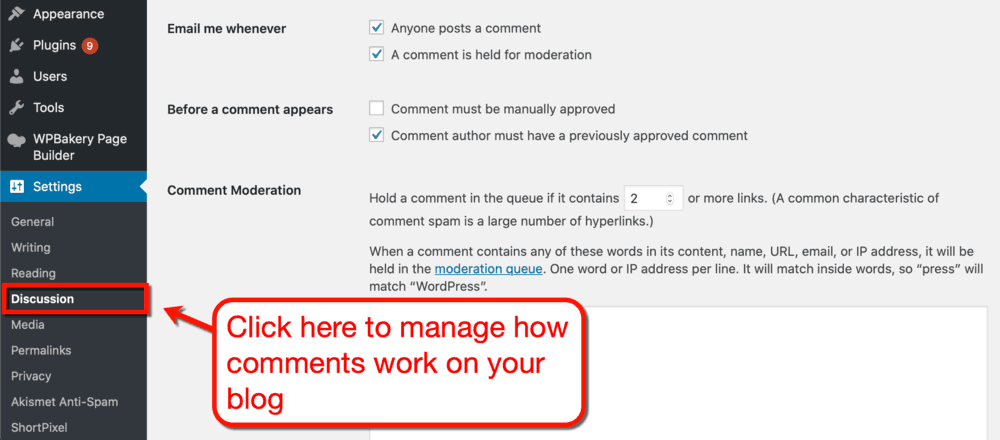
For WordPress users, this can be done by managing the “ Discussion Settings ” on your blog. You can set to manually approve comments every time, automatically approve previous commenters, require a sign-up, and so on.
Whenever you get a legitimate, insightful comment from readers, be sure to acknowledge them and respond as needed. This will encourage more readers to tune in or add to the conversation.
55. Run polls to extract insights from your community
Sometimes, a single comment is enough to inspire your next piece.
Still, it’ll be more efficient to address the needs of many.
By running polls on social media, you can leverage the collective voice of your audience to make smarter decisions.
Facebook is undoubtedly the most effective platform for this objective. It lets you run a poll simply by entering the possible options and specifying its time frame.

If you want more flexibility when it comes to the types of responses you can receive, use the free version of Google Forms . Respondents can then answer with checkboxes, multiple choices, drop-down list selection, and paragraphs.

Not sure how exactly should you use a poll for your blog?
A typical tactic is to let your audience decide what product or topic should you write about next.
You may also run a poll to collect your audience’s feedback on a recent change in your blog. It could be a new theme, logo, content style, and so on.
56. Widen your radar with social media listening tools
Listening to your audience should be easy.
That is, if they only post directly on your social media pages.
In the real world, people can talk about your brand from anywhere on social media. Someone could tweet about you, invite others to chip in their thoughts, and sparks a lengthy conversation.
A social media management tool like Hootsuite lets you monitor the web for these online mentions. It comes with a social media listening tool that aggregates posts from social networks like Facebook, Twitter, Instagram, and Pinterest.

What’s the advantage of having a social media listening tool over simply checking your social media notifications?
Imagine having users who complain about your brand or products.
Not all of those complaints will be posted directly on your official channels. Instead, users may be more comfortable posting them on their own social media feed or another page.
Social media listening lets you find those posts with ease — enabling you to respond and set the record straight.
There are also other benefits of using a social media listening tool, like:
- Reaching out to leads who may have questions about your brand posted elsewhere
- Clarifying misinformation being deliberately spread by dirty competitors
- Keep up with the latest trends in your niche
- Monitoring the marketing campaigns of your top competitors
57. Connect with influencers whenever you get the chance
There’s one more way to use a social media listening tool to build your blogging brand.
You can also use it to discover and connect with influencers who may be interested in your brand.
Keep in mind that a far-reaching social media presence requires a lot of time, money, and effort. But with the help of influencers, you can bypass all those requirements and instantly boost your content’s reach.
There are a lot of ways to discover relevant influencers that can promote a blog in your niche. The most reliable approach, however, is to use social media listening to your advantage.
Another tool you may be interested in would be BuzzSumo — a content research tool. It includes influencer marketing features that help you find, connect, and build valuable relationships with influencers in your niche.
Also, its core content research feature is pretty great for finding potential topic ideas for your blog.

BuzzSumo makes it easy to find content ideas that are highly shareable and engaging. Important metrics such as Twitter shares, backlink count, and Facebook engagement are immediately displayed on the results page.

58. Create “tweetable” quotes within your content
If you regularly drop facts, statistics, or plain words of wisdom in your posts, consider turning them into tweetable quotes.
In a blog post, tweetable quotes are bits of text that can be shared on Twitter with one click. You can create tweetable quotes with the help of plugins like Social Snap.
Here’s how it works.
For Gutenberg editor users, simply add a block and look for the “[Social Snap] Click to Tweet” option.

After this, just enter your tweetable quote straight into the block or the “Quote Content” field under the settings panel.

59. Add a “pin it” button to your images
Another advantage of a robust social media plugin like Social Snap is the support for a wide range of networks.
Social Snap, for example, supports over 30 social media networks and online apps. This includes Pinterest, which is an image-based social media network.
With Social Snap’s “Pin It” button, readers can conveniently share your image on Pinterest without leaving your site. It can be an infographic, food close-up shots, or any high-quality image worth spreading.
If you’re not ready to pay for Social Snap, you can settle for a free WordPress plugin instead. My recommendation would be a highly-rated plugin like jQuery Pin It Button for Images .

60. Make sharing easier for your readers
If you want to reach more social media users faster, don’t just rely on your own reach.
Ask your audience to help spread the word with a CTA and by integrating social sharing buttons into your blog.
The most straightforward to do this is to ask your readers to share your post when writing conclusions. Just make sure that it isn’t a hassle by integrating social media sharing buttons in the right places.
Sumo Share is a popular social sharing plugin for a reason. It lets you add a responsive floating bar with social sharing buttons to any site — without any coding experience.
As of writing this post, Sumo offers streamlined installation for sites built with WordPress, Shopify, Weebly, Tumblr, Blogger, and Squarespace. Alternatively, you can manually integrate the plugin by copying a bit of code and pasting it in your HTML.

What’s great about Sumo Share is that it can be used on your website free of charge. If you’re interested in a premium alternative, I recommend the tool Social Snap , which has way more features.
Other than sharing buttons, I use it to create tweetable quotes and “pin it” buttons, which I’ll discuss shortly.
61. Create a private group for your audience
To succeed as a blogger, you should know the difference between building traffic and building an audience.
The difference is simple, but it definitely changes everything.
You see, traffic comes and goes. Your audience, on the other hand, will come, respond, and come back to see more of your content.
To build an audience, a dependable strategy is to provide members a sense of exclusivity.
Offering gated content, which I already discussed earlier, is one way to accomplish this. An easier approach, however, is to create a private Facebook group.
If you’re new around here, you should know that I also manage a private group called the Master Blogging Community . It has the tagline “Blogging Tips and Strategies for Massive Profits,” but there’s more to the group than that.
As a sneak peek, I’ve been arranging meetups with members — something that not all Facebook group owners do. Members can also access units and the “Mentorship” feature, which allows them to connect with and learn from marketing professionals.
Would you like me to tell you everything about the Master Blogging Community?
If you’d like to know more, don’t hesitate to join the group.
Did you see what I did there? 😉
62. Use memes and GIFs
If you’re active on social media, there’s no way you’re not familiar with memes and GIFs.
These are bite-sized, humorous images and animations that spread like wildfire.
Memes and GIFs are so effective in capturing attention that brands have started utilizing them for marketing. Even I use it from time to time — specifically when I want to give new members of the Master Blogging Community a warm welcome.

What makes memes and GIFs so popular is how they’re often used to convey relatable scenarios. They’re also quite easy to make, and you have free tools like Imgflip to thank for that.

Don’t feel like creating an original meme?
Feel free to share the ones that other people made. All it needs is an original caption from you and it’s ready to be shared with your social media followers.
Just don’t overuse memes as they can distract your audience from digesting your core message. Also, be careful and avoid sharing anything that may come off as offensive to certain groups of people.
63. Stream live videos
Other than share posts, special discounts, and memes, I occasionally stream live videos to my followers.
Those are the times when I feel more than just a moderator of the Master Blogging group. Whenever I stream live, I felt like a true member who speaks, listens, and contributes to the community.
Social media websites like Facebook make it possible with their live streaming features. While broadcasting the video, viewers can react and post comments in real-time — as if we’re speaking face to face.

From the audience’s point of view, live streams heighten the sense of exclusivity and belongingness more than any other content. It also gives them the opportunity to get instant answers to their questions.
Apart from hosting live Q&A sessions, you can also stream interviews with influencers. Other ideas include streaming live events, product demonstrations, promotions, and random updates that show your blogging life behind the scenes.
64. Run simple contests
While helpful, you don’t really need a tool like Rafflecopter to run social media contests and engage your followers.
Creative brands have been utilizing the built-in features of social media websites to run simple giveaways and competitions.
If you search for “hashtag contest” on Instagram right now, you’ll see thousands of posts from brands who do this.

Some of the mechanics you can combine to run your own contests are:
- Require a Branded Hashtag — Picking the winners in a hashtag contest is as easy as can be. You simply need to search for the hashtag and let the site pull up posts with loads of engagement.
- Ask Your Audience to Upload Pictures — A common mechanic in hashtag contests is to ask participants to upload a photo as their entry. Using this in your contest will help you raise brand awareness and earn some user-generated content in the process.
- Require Participants to Like or Share — If your content prize is tempting enough, you may require participants to like your page, share your post, or both. Including this mechanic in your contest is guaranteed to maximize the value you get out of it.
65. Make sure your pages are loaded with custom graphics
It’s simply inexcusable for any professional blogger to use royalty-free stock photos as their Facebook cover photo.
Granted, generic-looking stock photos may work as temporary placeholders. But if you want to make a strong first impression on social media users, use custom graphics whenever possible.
Don’t worry about the cost of hiring a professional graphic designer just yet. Any simple graphic with your brand’s value proposition should do — more than doable with tools like Canva and Visme.

Other than your Facebook page’s cover photo, you should also make custom graphics for the following:
- Instagram posts
- Pinterest posts
- Blog featured images when shared on Facebook
- Twitter cover photo
- YouTube channel banner art
66. Join relevant social media groups in your niche
Promoting content on social media is guaranteed to give your blog some exposure.
What it doesn’t guarantee, however, is exposure to users who are actually interested in what your brand has to offer.
With that in mind, joining groups in your blog’s niche should be part of your social media goals. This will ensure that your brand will reach the right crowd.
The only obstacle here is finding groups that allow members to post self-promotional content.
Some groups that allow them may have a list of conditions you should abide by to maintain your membership. Your best bet is to check the group’s description as soon as you gain entry.

Other than sharing your content, do your part and be an active member of the community. This means answering questions, reacting to other people’s posts, and giving praise or criticism where it’s due.
67. Obtain and leverage user-generated content
Photos uploaded by your audience on social media are just one example of user-generated content.
What other types of user-generated content are there, you ask?
There’s quite a handful of them:
- Customer reviews
- User comments on social media posts
- User comments and responses on Q&A sites
- Posts on customers’ own blogs
- Forum posts
What makes user-generated content or UGC valuable is the fact that they’re trusted more than content published by brands.
According to the Local Consumer Review Survey in 2019 , 81 percent of users between ages 18 and 34 trust reviews.
Encouraging readers to leave comments on your posts is a proven way to obtain user-generated content. Other than that, you can automate review requests via emails whenever someone purchases your product or service.
That makes this the perfect time to transition to email marketing tips for bloggers.
Email Marketing Tips for Bloggers
With a plethora of ways to communicate online, you may be surprised that emails are still relevant for marketing.
Unless, of course, you’re in tune with the latest email marketing statistics .
What if I told you that 73 percent of millennials prefer to receive messages from brands via email? It’s also true that 99 percent of consumers check their email accounts daily.
Yes — emails still offer an effective way for bloggers to connect with their audience.
Below are the tips that will help you do it:
68. Promote opt-in bribes to convert more visitors into subscribers
Not getting enough subscribers in your mailing list?
You can encourage more visitors to click that “subscribe” button by offering a juicy opt-in bribe.
It’s not rocket science, really.
Users want value in return for all the actions they do online. With an opt-in bribe, that value will be as visible as ever.
I’ve utilized a number of opt-in offers or lead magnets throughout my blogging career. Here are some of the top-performing opt-in bribes you can use:
- Free eBook
- Exclusive discount
- Free product or service trials
- Ready-to-use templates
- Checklists
69. Use email automation workflows
A mailing list is indeed a powerful platform for lead generation and nurturing.
However, a lot of bloggers underutilize it by failing to effectively scale and handle a growing list.
Different messages work for different subscribers. There are people who want to learn more about you, curious about your industry, comparing alternatives, and so on.
Ideally, every email you send is handcrafted to suit each individual subscriber. But since that’s straight-up impossible, effective bloggers have learned to use email marketing automation instead.
Sounds intimidating?
Don’t fret — email marketing platforms like ConvertKit and MailChimp have tools to make the job a walk in the park.
In addition to email subscriber segmentation features, they also have ready-made automation templates you can launch in a jiffy.
Remember when I told you that you can automate review requests to earn user-generated content?
If you use MailChimp, this is the automation template you need:

You can also use the workflow above to automate cross-selling emails to your recent customers.
For more ideas, here are some of the best automated email workflows you can use:
- Welcome email — Automating a welcome email is a great way to set a new subscriber’s expectations and promote your pillar content. It’s the easiest way to automate an email since you only need to target every user who recently subscribed.
- Weekly newsletter — A weekly newsletter is another example of an email that requires an easy-to-do automation workflow. It may not be as engaging as other laser-targeted messages, but it does help spread the word on your blog.
- Birthday email — If you require users to enter their birthday during registration, you can use that information to automate birthday emails. Those are opportune times to promote special discounts and offers since they’re more likely to be in a shopping mood.
- Remarketing email — If subscribers reach a sales page but don’t push through with a conversion, they’re prime targets for email remarketing. This is where you send an email reminder that they haven’t completed their purchase and, hopefully, recover lost sales.
- Sales email for marketing qualified leads — A marketing qualified lead or MQL is a prospect who met set criteria indicative of strong purchase intent. Defining your MQLs is a step in building your own sales funnel, which leads us to the next point.
70. Curate content that your audience will appreciate
Not everything you send to your users should be about you.
Don’t forget that most email subscribers signed up because they were promised valuable information. Whether or not that information came from your website isn’t their concern.
That’s why, if you’re out of ideas for your email, you should try curating content from other sources.
For example, if you’re a fashion blogger, you can send your subscribers updates about the hottest fashion icons or influencers. Naturally, you should also share your opinions and insights to prove that you know your stuff.
There’s no secret formula when creating emails that contain curated content. Just write a simple email in plain text with links to the content you want to share.
In exchange for the free, useful information you provide, your audience will reward you with their trust and loyalty. They should also be more eager to check your next email if they know they’re getting valuable knowledge.
71. Write click-worthy email subject lines
Clicking the “send” button right after finishing your latest email blast copy is a fulfilling experience.
That is, until you remember that not everyone on your mailing list will actually read it.
Don’t beat yourself up over it. Remember, even the most accomplished marketers in history never had perfect email open rates.
What you should do is focus on the factors that can affect the likelihood of subscribers to open your emails. One such factor would be your emails’ subject lines, which is the equivalent of headlines in blog posts.
There’s actually no one-size-fits-all recipe when it comes to writing email subject lines. You’ll have to go by trial and error to concoct your own combination of strategies.
Check out the tips below on how to write winning email subject lines:
- Use the Word “Tomorrow” — It may sound weird, but adding “tomorrow” to your email subject lines can increase open rates by 10 percent . This works by making your email’s message sound more urgent.
- Stop Using the “RE” or “FW” Prefix — Adding the prefixes “RE” and “FW” may have worked at first, but they’ve proven to be very costly now. Not only can it trigger the recipient’s spam filter, it can also leave a bad impression on marketing-savvy subscribers.
- Keep It Short — Long email subject lines may get truncated when displayed on your subscribers’ inboxes. This problem is more common now that people frequently check emails on their smartphones.
- Test Emails with No Subject Lines — You read that right — you can actually increase your email open rate by 8 percent by removing the subject line. Since it may not be appropriate in some niches, run split tests to make sure this trick works for you.
72. Split test your emails
Now that I’ve mentioned split testing, let me give a brief explanation to those who don’t know what it is.
Basically, split or A/B testing is when you test multiple variations of pages, emails, CTAs, and so on. This will essentially cut the time it takes to acquire sufficient test data by half or more.
ConvertKit allows you to split test multiple versions of your subject line to determine which variant works best.

Of course, it may take some time before you gather enough data.
ConvertKit actually recommends using the split test feature once you get at least 1,000 subscribers. Otherwise, it will be night impossible to acquire conclusive data.
Eventually, you should be able to pick a subject line the consistently outperforms the rest.
Split testing is just one of the ways to leverage analytics to make better decisions for your blog. There will be more brilliant ways to use analytics by the end of this post.
73. Manage your sales funnel
A sales funnel is something that exists in every blog or website for that matter.
However, only those who successfully monetize their blog know what to do with them.
Let me break it down for you.
You see, a sales funnel consists of different stages that measure how close a lead is to buying something.
The most common sales funnel model has four stages:

- Awareness — This is when a prospective lead first learns about your brand. They may have seen a post on social media, an ad, a mention in another blog, and so on.
- Interest — The interest stage is when a lead starts to do research and consider if you’re worth their time. They’re not ready for your sales pitch yet, but they sure will find educational content incredibly helpful.
- Decision — By the decision stage, leads are just about ready to make a purchase. They’ll be looking at your product pages, looking for alternatives, and search for free trials they can use — if any.
- Action — From a marketing perspective, the action stage in a sales funnel is the finish line. This is where the lead finally turns into a paying customer, making them ripe for remarketing opportunities in the future.
Once you understand how the sales funnel works, it should be easier to segment your email marketing leads.
Have they checked your blog? They’re in the interest stage — send them more informative content to establish your expertise.
Have they viewed your product pages? Send them a special discount or offer a freebie to sweeten the deal.
Of course, everything I’ve discussed here uses a simplified version of the sales funnel.
In bigger companies, the marketing and sales teams should collaborate closely to build the sales funnel. Communication is also important to develop a more refined set of qualifications for MQLs and sales qualified leads or SQLs.
As for smaller blogs, you only need to worry about each lead’s interactions with your brand. That should help you decide the right kind of content promotion for them.
SEO Strategies for Bloggers
Don’t put your email marketing tool away yet — you’ll still need it in this section.
For most new bloggers, the word “SEO” is enough to make them flinch. And looking at the prices of SEO companies lately, I can’t blame them.
This takes us to the first SEO tip you should know if you’re new to blogging:
74. Don’t hire an SEO agency right away
SEO or Search Engine Optimization may be a crucial pillar of digital marketing. However, it’s unwise to invest in professional SEO services as soon as you build your site.
To get measurable results, you need to invest hundreds — if not thousands — of dollars a month in your SEO campaign. This isn’t ideal for a budding blogger who needs to make every single cent count during their website’s early stages.
Eventually, you’ll need professional SEO services to help with activities like link building and blogger outreach. But until your website can sustain itself with a steady stream of profits, focus on content development and on-page optimization .
75. Establish a solid internal link structure
Since I already brought up on-page SEO optimization, let’s talk about your website’s internal link structure.
To understand why it’s important, you need to know how search engines discover and index web pages.
Basically, search engines like Google send out “crawlers” that evaluate rank-worthiness using SEO signals and overall content quality. These crawlers visit millions — if not billions — of pages every single day by traveling through links.
With internal links, you can help search engines discover and index more of your website. This, in turn, will boost your website’s overall authority and rank-worthiness.
Now that we got that out of the way, the question remains:
How do you build an SEO-friendly internal link structure on your website?
76. Don’t forget outbound links
If internal links redirect to other pages within your site, outbound links point users and crawlers to entirely different sites.
An outbound link is a type of “ external link ,” which exists between two different domains.
And yes — outbound links do have an impact on SEO in more ways than one:
- They Improve the User Experience — Outbound links prevent readers from hitting a dead end when conducting online research. This makes your content more enriching and valuable to them — exactly the type of content that search engines want.
- Establish Your Content’s Topical Relevance — Links in general, whether internal or external, are recognized as important for establishing “topical relevance.” This helps search engine crawlers determine what your content is all about.
- Network with Authoritative Brands — Linking to an authoritative site, especially from a top-notch piece of content, is a great way to get their attention. If they like the way you describe their brand, it might compel them to share your content with their followers.
77. Check your website’s mobile friendliness
Whenever Google rolls up algorithm updates, they almost always emphasize how those changes can improve the user experience.
With the ever-increasing usage of mobile internet, it’s not surprising that a website’s mobile friendliness has become a ranking factor.
Fortunately, there’s a good chance that your website already performs fairly well on mobile devices. Regardless of your blogging platform, most developers already design and develop themes with mobile friendliness in mind.
Your job now is to iron out the creases. Ensure that every building block of your site is optimized for mobile users.
Google’s own Mobile-Friendly Test tool will let you know where to start. Simply enter your blog’s URL and click ‘Test URL’ to begin.

It should take several seconds before the tool finishes analyzing your site. When it’s done, it’ll provide you with a report that states if your website is mobile-friendly enough or not.
If it’s the latter, Mobile-Friendly Test will show you a list of issues that demand your attention.

78. Get more optimization suggestions from Google PageSpeed Insights
You may notice that most of the optimization suggestions from the Mobile-Friendly Test pertain to design-related issues.
It’s one thing to make a website visually usable and comfortable on your audience’s devices. But in order to give users the best possible experience, you should also focus on your website’s performance.
PageSpeed Insights is another piece out of Google’s arsenal of website optimization tools. It’s designed to help website owners identify and solve performance-related issues on their site.
To use PageSpeed Insights, enter your website’s URL and click ‘Analyze.’

The tool should immediately get to work and identify issues that increase your website’s loading time. More importantly, it matches each issue with an optimization suggestion — plus, learning resources to teach you what to do.
You can find these actionable insights under the “Opportunities” section.

79. Compress your images
So, you’re already familiar with cloud-based image editing tools and you’re excited to create beautiful visuals for your blog.
Just remember to use lossless compression to reduce their size without compromising image quality.
Keep in mind that images utilize more bandwidth than text when being loaded on a page. The bigger the image, the more bandwidth it requires — increasing the time it takes to show them on screen.
An image compression tool like Kraken.io reduces this problem by shrinking the size of your images. It also features a lossless optimization mode that lets images keep all visual information after being compressed.
In other words, you get to reduce the file size of images with minimal changes in quality and clarity.

You may be asking, what if I use a WordPress plugin like Smush to automate the optimization of my images?
That’s not really a bad idea, but there’s something you need to know about plugins first.
80. Practice plugin hygiene
As a WordPress user myself, I understand why some bloggers get carried away when installing plugins.
A plugin that integrates functional contact forms into any theme? That’s something I need!
What about a plugin for a fancy, interactive calendar on your homepage? Yes, please .
I get it — plugins are great. But if you install too many of them, you’re negatively affecting two things.
First and foremost, too many plugins can bottleneck your website’s performance.
Here’s the thing: every single plugin you install will consume precious server resources and inevitably impact your website’s performance.
That’s why most all-in-one page builders tend to slow your WordPress site down unless you perform all the necessary optimizations. As soon as they’re activated, they create pieces of code — from CSS to JavaScript — that can bog down your site.
On the bright side, there are countless proven plugins that are either lightweight or well-optimized out of the box. Even if they do impact your website’s performance, their effects are barely noticeable.
Other than performance-related issues, having too many plugins may also affect your productivity.
Have you ever tried working on your WordPress site with these many items on your dashboard?

In addition to being distracting, too many plugins can also slow down the performance of the dashboard itself. There’s also the possibility of plugin conflicts that can lock you out of your WordPress account.
As a rule of thumb, avoid installing plugins that have similar features. Also, be sure to check plugin reviews before installing them to see if other users are experiencing issues.
81. Write longer posts
Earlier in this post, I encouraged the practice of adding a subheading after every 300 words in your posts.
This begs the question: how long should your blog posts be, anyway?
If you want your content to rank highly in search engines, then you should aim for at least 1,890 words.
A study by Backlinko revealed that this is the average word count of content on Google’s first page.

It may sound tedious to produce 1,890 words every single time. But if you care about the value you can provide to your users, then this shouldn’t be a big deal.
I, myself, consistently smash through this objective by producing content over 3,000 words — oftentimes more.
82. Optimize all your visual assets
Going back to your blog’s visuals, there are a few more steps you need to take apart from image compression.
Let’s go through all of them quickly:
- Use Keyword-Optimized File Names — Operating systems have a nasty habit of giving incomprehensible names to images. Rather than something like “IMG_0735.png,” use meaningful names like “simple-vegan-carrot-cake.png” or “SEMrush-backlink-analyzer-interface.png.”
- Add “Alt Text” Tags to Images — The “alt text” tag of an image is displayed whenever an image fails to load on the user’s browser. You should also use keywords here, but it’s more important for alt text tags to be descriptive.
- Choose the PNG Format Whenever Possible — When saving images for your blog, opt to use the “PNG” format to maximize quality. The only acceptable reason to use the “JPG” format is when you’re uploading large, high-resolution images.
- Scale Your Images to a Set Size — A lot of image compression tools also give you the option to scale them up or down to a specific size. When doing this, make them all the same width so they line up perfectly when added to your post.
83. Use the Yoast SEO WordPress plugin
One of the main reasons why many bloggers should choose WordPress is its compatibility with a range of useful plugins.
Yoast SEO, in particular, is so important that it probably comes pre-installed in your WordPress ecosystem. Its main function is to monitor your content for on-page SEO factors as you edit them.
For example, as you write content, Yoast SEO evaluates readability factors like subheading distribution, sentence length, and paragraph length. It also checks on-page optimization factors like image alt text tags, inbound links, and focus keyword usage.

The more you try to follow the plugin’s recommendations, the easier it is to do. In fact, I often create drafts that Yoast already deems good in terms of readability and SEO from the start.
84. Write keyword-optimized meta descriptions for your post
It’s verified time and time again that meta descriptions don’t directly affect a post’s search engine rankings.
So, why do SEO experts still recommend writing keyword-optimized meta descriptions?
Two words: higher CTR.
CTR, short for click-through rate, measures the likelihood of your post to get clicks in search engine results. This is largely affected by your post’s meta description, which is the snippet of text displayed below your post’s title.

The steps in changing your post’s meta description depend on the blogging platform you use. Wix users, for instance, can edit it directly from the ‘SEO (Google)’ section of the settings page.

For WordPress users, the easiest approach is to use the Yoast SEO plugin.
When activated, click ‘Snippet Preview’ on the Yoast SEO panel. This will load up the “Snippet preview” window where you can directly modify how your post appears in search results.
Other than the post’s meta description, you can also change its SEO title and URL slug.

85. Write content for other websites
Writing an article for your blog may seem easy at first. However, it won’t be long before you realize that consistently producing quality content can be mentally and physically draining.
With that said, why on earth would you spend your energy to write content or “guest posts” for another blog?
There are actually several good reasons for this:
- Free Backlinks — When publishing guest posts, most blogs allow contributors to include a link to your own website. Links can be inserted within the content’s body or in your author bio.
- More Exposure — Guest blogging lets you leverage the established reach of the blog you’re contributing to. That should be enough motivation for you to create top-notch pieces for your guest posts.
- Build Your Network — For new bloggers, landing your first-ever guest blogging arrangement can be tough. But as you write more guest posts, it’ll be easier to convince other brands to accept your guest blogging proposals.
Interested in guest blogging?
86. Find websites that accept guest posts with Google
If you’re looking for websites that accept guest posts, Google would be an excellent starting point.
What you need to do is use relevant keywords along with “guest blogging footprints.” These are phrases of text that are present in sites that openly invite guest post submissions.
For example, let’s say you’re in the “home improvement” niche. To find sites that accept guest posts, enter any keyword and add “guest post by” as the guest blogging footprint.
Don’t forget to use the quotation mark operator around your guest blogging footprint. This will prompt Google to find pages with those words in the exact same sequence.

You should be able to find several websites that accept guest posts from Google’s first page alone.

87. Use a guest contributor’s bio to find other sites that accept guest posts
Another strategy I use to find websites that accept guest posts is to use the author bio of popular contributors. I just copy at least two sentences from their bio and enter it on Google.
Why does this work?
Simple: because a lot of bloggers can’t be bothered to write unique bios for every site they contribute to .
If they do, chances are the wordings are so similar that search engines will still identify the blogger without fail.
Let’s see this in action.
On HuffPost , we can see blogger Raelyn Tan’s bio in full display.

To look for other websites where she contributed, copy the first two sentences of her bio. Next, head to Google, paste what you’ve copied, and click ‘Google Search.’

Within seconds, Google should reveal other sites where he may have contributed.

In some cases, you should see two or three more sites where the blogger submits guest posts. If you find a competitor who’s particularly active in guest blogging, expect to see several of these sites.
88. Utilize a backlink checker to identify your competitors’ backlink sources
Finding websites that accept guest contributions for link building isn’t exactly difficult.
At most, you’re looking at an hour or two done on research — plus two minutes crafting an outreach email.
But what if I tell you that you can turn two hours of research into a couple of minutes with a backlink checker?
SEMrush, for instance, can provide quick insights on any website’s backlink profile. Simply load up their “Backlink Analytics” tool and enter your competitor’s domain or page URL and click ‘Check it.’

Suppose you’re a big-time blogger yourself and your competitor is Backlinko.
After entering their domain and loading the results, switch to the “Referring Domains” tab. That’s where you can view the list of domains that link to Backlinko.
Just remember to use the “Authority Score” filter to see the most relevant referring domains first.

With a list of potential backlink sources in hand, you’re now ready to launch your email outreach campaign.
89. Use plain, natural-sounding emails when doing outreach
Finding potential influencers and referring domains is meaningless if you don’t have an outreach plan.
For sites that accept guest posts, sometimes you only need to fill up a form and wait for their response. But for most prospective influencers and referring domains, you’ll need to contact them via email.
If you recently got your hands on an email marketing platform with well-designed templates, do yourself a favor — ignore them.
Instead, craft personalized, plain text emails.
It may seem counterintuitive, especially if you want to make your brand look more legit. However, there are several reasons — and evidence — as to why plain text emails are better:
- HTML emails reduce open rates — Split tests conducted by HubSpot show that emails with fancy HTML elements have lower open rates than plain text emails. The more HTML elements are present, the lower the open rate gets.
- HTML emails get lower click-throughs — Let’s face it, HTML emails often look more salesy and promotional than plain text emails. If you want subscribers to believe your message and take action, your email must feel genuine and personal.
- Plain text emails are more suited for mobile — Statistics show that 66 percent of emails are now being opened on mobile devices. Since most email templates are designed with computers in mind, they could inadvertently worsen the reading experience of mobile users.
The reasons I’ve stated above are why I don’t bloat my emails with HTML elements myself.
At times, I include a screenshot or two to convey certain points. But more often than not, the emails you’ll get from me will look like this:

And, yes — I also use plain text emails when conducting outreach.
To know more about the exact process of writing believable emails, read my guest blogging guide.
90. Spread your blog content through Q&A websites
Now that we’re on the topic of backlinks, it’s only fair to tell you that not all links are equal.
If you’re lucky, an authoritative blog will allow the use of “dofollow” links in guest posts.
For the non-SEO-savvy, the “dofollow” attribute tells search engines like Google that a backlink should pass on “link juice.” This is a term used to describe the SEO value of backlinks passed from site to site.
“Nofollow” links, on the other hand, basically tells search engines that the specific link shouldn’t pass link juice.
In other words, only a dofollow link can directly affect the rankings and perceived authority of the link’s receiving end.
So, does that mean that all “nofollow” links are useless?
Nope — especially if they can get quality traffic to your site.
Popular Q&A websites like Quora , for example, can flood your blog with targeted traffic if you play your cards right.
The links you can build may have the “nofollow” attribute. However, your brand will still be exposed to Quora’s massive user base, nonetheless.

.
91. Find broken links from authoritative sites
The problem with traditional link building is that you’re not guaranteed link placement.
Even if you’re given a “go” signal for a guest post, there’s still a possibility that it won’t get published.
High-authority websites, in particular, can be very finicky with the quality of posts they publish.
With broken link building, bloggers are able to get more results from their link building campaigns.
The process can be explained in three simple steps:
- Find broken links in authoritative sites
- Write a post that can substitute for the dead content
- Tell the authoritative site about the broken link and your new content
Everyone knows that broken links are bad for a website’s SEO. As such, any website owner should thank you for pointing out broken links in their content.
The least they can do is return the favor and link to your replacement content instead.
Just be sure to create something top-notch and polished — I cannot stress this enough.
If I own a high-authority website, I would rather delete the link than send my readers to a subpar site.
Also, try to recreate the dead content and reach the site’s administrator as soon as possible. You never know if someone is already targeting the same broken link.
To scan websites for broken links, you can use the free Broken Link Checker by Ahrefs .
Just type in the URL of the website you want to check and click ‘Check broken links.’

It shouldn’t take long before the tool shows the top 10 broken links on any site — no registration required.

If you want to all broken links in one go, you’ll have to sign up for an Ahrefs account. Otherwise, you can focus on the top 10 broken links and then run the test again after fixing one.
As a final piece of advice, try to look for broken links in posts that are relevant to your brand. You can’t just revive every broken link you find, especially links from posts that aren’t relevant in your niche.
92. Revive broken, inbound links
Finding broken links will not only help you link building opportunities from authoritative sites.
In some cases, it can help bloggers find and fix broken links they already earned.
Again, broken link checkers can help you find broken inbound links to any site. By plugging in your own domain, you should be able to find links to your site that can be recovered.
I, myself, have a huge backlog of broken links that I can still fix.

To fix broken inbound links, you’ll need to look into each issue individually.
For example, if the link is broken because you updated the post’s URL, contact the linking domain’s owner. That is, if it isn’t too late for you to revert to the post’s old URL.
Alternatively, you can set up a 301 redirect that captures all lost traffic and funnels it into the correct post. This can be done manually using the instructions found here or with the help of a plugin like 301 Redirects .

Lastly, there are also cases when the linking domain used faulty code when linking to your post. For these situations, your only hope is to get in touch with the linking domain’s administrator.
Bonus Tips
Congratulations on making it this far!
I did my best to distill the most important strategies I know regarding the core aspects of blogging.
As a sign of my thanks, here are 10 bonus tips to help you overcome the everyday challenges of blogging:
93. Learn to block out distractions at home
Distractions can turn even the best bloggers into the laziest writers.
The worst part is, distractions are everywhere.
They can come from your smartphone, your surroundings, and even your work computer.
The good news is, blocking out distractions at home doesn’t need to involve complicated steps.
Designating an official, private work area in your home is a step in the right direction. If you’re bombarded by noise that breaks your flow of thought, use headphones and fire up noise generators like Noisli .

To use Noisli, just move the volume controls under the type of noise you want to play. This will help make you feel as if you’re working in a café, train, forest, or while it’s raining.
You can also play white, pink, and brown noises which are proven to have varying effects on a person’s focus. Play around with different sound combinations to find the one that suits you — it’s completely free.
94. Develop your daily writing routine
We humans are creatures of habit.
If you build and stick to a daily blogging routine, you’ll definitely be more productive and efficient over time.
What’s the perfect way to get your daily blogging tasks done?
While there’s no perfect answer to this question, I can help you find a routine that works for you.
Here’s a summary of the steps you need to take:
- Step 1: Know your own writing speed
- Step 2: Determine how many words you need for your content
- Step 3: Set a target number of words to write daily
- Step 4: Build a schedule that meets your objective with plenty of breaks in-between
Nice and simple.
You don’t really need a detailed guide to tell you how to perform each step. But if you want to do it in the most rewarding way possible, I highly recommend getting The Content Rulebook.
It’s packed with all the information you need to engineer a daily blogging routine that suits your work habits.

95. Offer freebies when selling products
Since everyone loves free stuff, let’s discuss the importance of offering freebies when selling your own products.
In case you didn’t know, I offered a bunch of free stuff to go along my eBook — The Content Rulebook.
Did I think it will help the book get more sales?
Absolutely.
When done right, freebies are guaranteed to increase the perceived value of any product or service.
However, that’s not the only reason why I decided to do it.
When I made The Content Rulebook, I’m 100% confident with the outcome. But then, I realized that I’ll be even happier if my readers find success with it.
That’s when I began to find opportunities to further improve the value my product can offer. I created an exclusive swipe file for their vocabulary, a checklist for quick notes, and bonus resources for learning.
It’s all about finding ways to guarantee the success of customers with your product or service. As a result, people were really happy with what they received.
96. Automate simple tasks with IFTTT
As you implement more growth strategies for your blog, the harder it is to keep up with your daily workload.
One-man bloggers can attest to the pain of writing, answering emails, and responding to comments — all in the same day. Not to mention that every blogging task requires a certain level of research.
This is where an automation tool like IFTTT comes in handy.
Short for “If This, Then That,” IFTTT lets you design simple yet useful automation workflows between different apps or services.

If you want to save even more time, the site already has a huge library of pre-configured automation workflows. Just pick something up, fill in the necessary details, and you’re good to go.

For the list of my favorite, time-saving IFTTT applets, visit this page .
97. Capture your ideas with a note-taking tool
Ever think of an amazing topic idea for your next post — only to completely forget about it later that day?
This is something that happens to me a few times a day, especially while traveling. And to make sure these ideas don’t fade away from my memory, I jot them down.
Sometimes, I use Evernote , which automatically syncs notes between all my devices.
Whenever I take a note on my phone, it automatically and immediately becomes accessible on my computer. For grueling research sessions at home, I can easily save information from websites using the “Web Clipper” tool.

Of course, I’m not saying that you should pay for Evernote right now just for your note-taking needs. There are free alternatives out there, including the built-in note-taking apps in most operating systems.
If you want, you could even use a physical notebook. This is preferable to bloggers who still practice writing down notes by hand.
98. Keep building on your knowledge
Want to know another great use for a note-taking tool?
Storing and organizing information that may come in handy one day.
When I was new to blogging, I used Microsoft OneNote to collect and organize marketing concepts that I didn’t understand. I remember listing down terms like “on-page SEO optimization,” “link building,” and “remarketing” — each with links to relevant learning resources.
If you’re at a point in your blogging career where you encounter truckloads of confusing words, do what I did.
It shouldn’t be hard, and it will definitely help you craft better content and scale your blog in the future.
Today, the document I spend the most time with is my swipe file, which I’ll discuss in the next tip.
99. Create a swipe file of reusable English words and expressions
I wish I could say that I’ve mastered the English language, but I haven’t.
Every so often, I come across an interesting word or expression that I think could spice up my future posts. And when that happens, I quickly pull up my personal swipe file and add a new entry.
For copywriters, a swipe file is a list of text-based templates that are proven effective in advertising and sales. My swipe file is a little different since it only contains words and phrases that I can use when writing.
If you haven’t yet, I suggest you create your own swipe file now with spreadsheet software like Google Sheets . You only need two columns — one for the word or expression and another for examples.

100. Be less salesy and be more you
Online marketing has been around for years.
By now, most internet users can easily discern if a blogger is being sincere or simply after their money.
This may occur to you if your blog posts contain more promotions than it has insightful and actionable advice.
A change of mindset is needed if you want your audience to perceive you as genuinely passionate about their goals. Rather than just spewing out content, sending emails, and responding to comments, try to commit to the following:
- Respond to Your Fans via Email — It’s understandable for brands like Backlinko or HubSpot to ignore emails. But for small bloggers, fan emails are unmissable opportunities to build your brand.
- Post and Share Content that Isn’t About You — When curating content, you’re showing your audience that their needs are more important than your brand image. Keep it up by sharing social media items that aren’t about your brand, including memes and your audience’s posts.
- Tell Them About Your Life — Every once in a while, consider sharing social media updates about your daily experiences. A spilled cup of coffee, unexpected visitors, impromptu walks — anything that reminds them to appreciate the little things.
- Arrange Local Meetups — Like I’ve said, I’ve been extra busy lately arranging meetups with members of the Master Blogging Community. This allows me to become not just a blogger and mentor, but a friend building bonds within the community.
101. Don’t put all your eggs in one basket
It’s true that blogs require your utmost dedication and focus in order to prosper.
But once your main money blog becomes self-sustaining, you should be open to the idea of diversifying your investments.
Believe it or not, a lot of successful bloggers who made millions have more than one website generating passive income. Their most profitable blog also isn’t always their first.
The only issue here is the workload of having to manage two or more blogs at the same time. When this proves a little too much for you, think about outsourcing repetitive tasks like editing and social media management.
You can get the help you need from freelancing marketplaces like UpWork and FreeeUp .
102. Track and improve anything
In online marketing, you can’t improve what you don’t measure.
If your blogging strategy isn’t working, you don’t just decide what to change on a whim. You need to zero in on what went wrong, explore your options, and use data to show the way forward.
But first, you’ll need some tools for the job.
Google Analytics is one of the essential tools that every blogger needs in their closet. It monitors every single facet of your website and your web traffic, including:
- Your Top Traffic Sources — Wondering if you’re getting enough traffic from social media, Quora, or your emails? Google Analytics can confirm it by recording your website’s real-time traffic data.
- Your Top Pages — If you’ve been experimenting with different content types and topics, Google Analytics can pinpoint which strategies work. This allows you to easily round up your top posts in terms of page views, bounce rate, and so on.
- The “Drop-Off” Points in Your Blog — Google Analytics is able to map the flow of traffic across your website. This allows the tool to identify pages where your readers tend to leave or “drop off” from your site.
- Basic Performance Metrics — As icing on the cake, Google Analytics compiles real-time performance metrics of your website. This includes your site’s overall bounce rate, session duration, and number of monthly active users.
- In-Depth Audience Demographics — Finally, Google Analytics lets you perform a deep dive into your audience’s demographic data. You can learn about their average age, what language they speak, their interest categories, and more.
Another thing I love about Google Analytics is it’s one-and-done implementation process.
After a few minutes of setting it up, you’re set for life. Google Analytics will continue to provide you with a deep pool of insightful data for as long as you need.
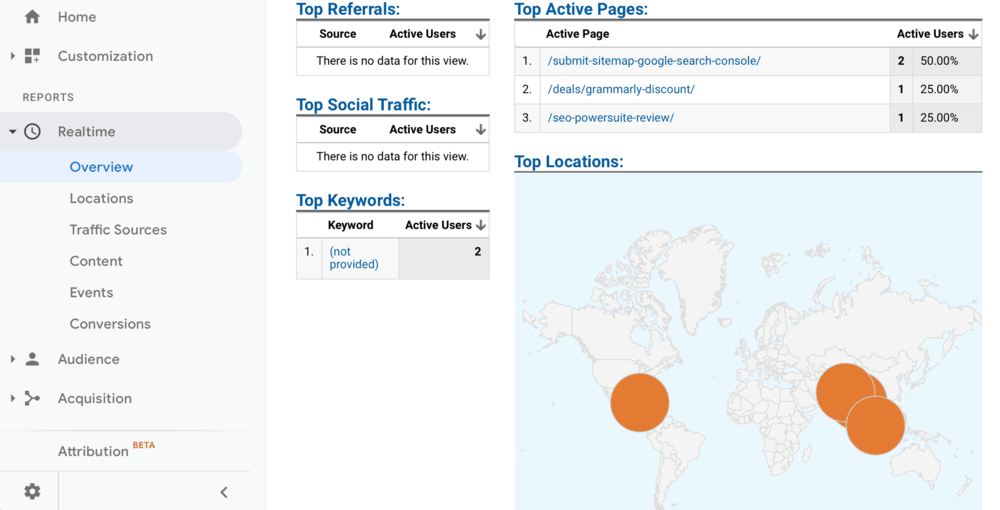
Speaking of which, I covered the steps on how to set up Google Analytics in this guide . Give it a read to learn more about this amazing tool.
Conclusion
I’d like to come clean about one thing:
I can probably stretch this super massive post to cover way more blogging tips.
However, I decided to handpick the most important blogging tips that every beginner should know. This will help them secure the foundations of a successful blog while growing and learning more by exploring this site.
Rest assured that most of the blogging tips above are already covered in a previous DTG Blogging post. Just follow the in-text links peppered throughout this guide to learn everything you want to know.
What did you think of this post? Is there an important blogging tip that I missed?
If you have suggestions, questions, or any comments regarding the post I made, you know what to do. Also, don’t forget to bookmark and share this massive guide to those who need it!
If you like this post then don't forget to share with other people. Share your feedback in the comments section below.


You are welcome to share your ideas with us in the comment!